data2check documentation – The InDesign-to-EPUB Check
Table of contents
1. The InDesign-to-EPUB Check
With the InDesign-to-EPUB Check Adobe InDesign files can be checked for their suitability to be exported into the EPUB format.
This check contains the most common criteria for a successful export to EPUB, as for example:
- text markup in InDesign being relevant for the EPUB export must be saved as paragraph or character styles
- completeness of the metadata
- correct anchoring of pictures
- correct links (existing targets)
- common errors like manual footnotes or lists
- and much more...
As a result of this check you get two check reports (SVRL and HTML) as well as a commented version of your uploaded InDesign file. Further information on the check results can be found under 2.2 The output documents.
2. Checking a document
Under the menu option »Documents« you can check Word and InDesign documents with the help of a previously created configuration. Furthermore, you can check here whether your InDesign documents are suitable to be published in the EPUB format.
2.1 The checking process
By clicking the »Choose file« button (see figure 1), your file manager opens, where you can select an InDesign document to be checked (see figure 2).
NOTICE: All formats of the files to be uploaded must be XML compatible. This means: please upload only files with the extension .idml for an Adobe InDesign document!
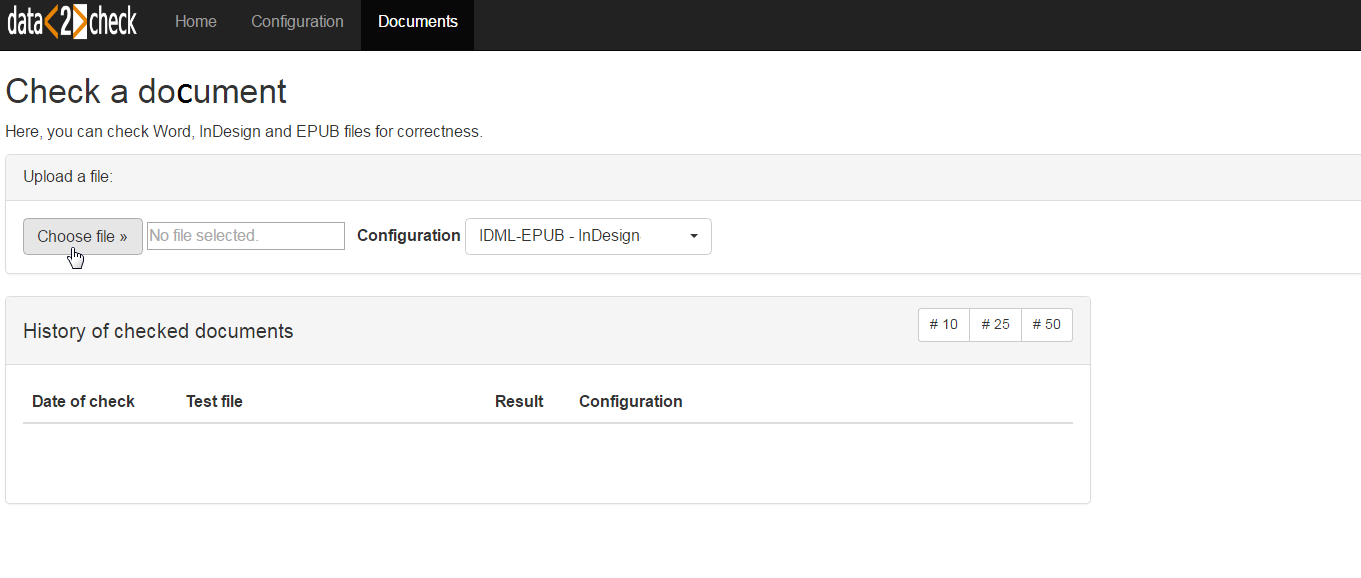
Figure 1: Upload of a document to be checked - Step 1: Clicking »Choose file« to open the file manager.
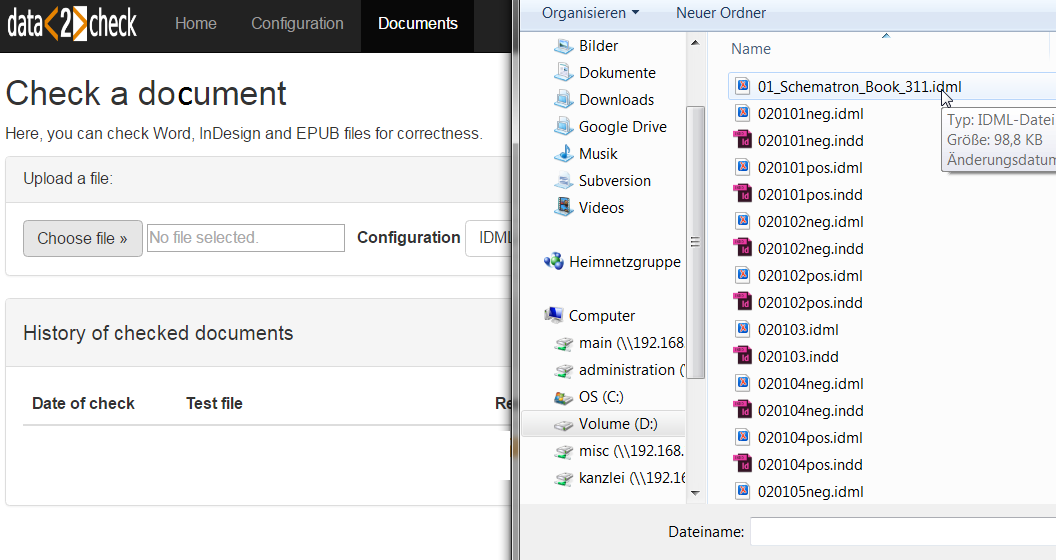
Figure 2: Upload of a document to be checked - Step 2: Choosing an .idml file.
After selecting an InDesign document via double-click, the configuration type IDML-EPUB - Testing InDesign for export into EPUB appears in the dropdown list next to »Configuration«. Plese select this type (see figure 3).
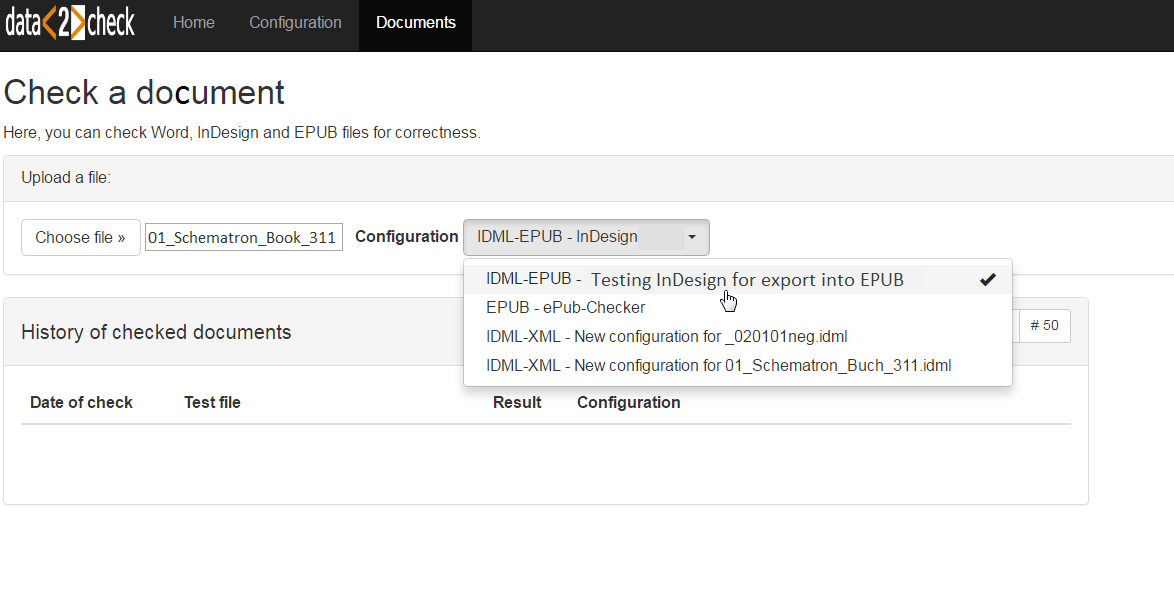
Figure 3: Available configuration types after selecting an InDesign file (exemplary presentation).
After selecting a document to be checked and the configuration type IDML-EPUB - Testing InDesign for export into EPUB, please click the green »Upload file and start a check« button in order to start the checking process (see figure 4).
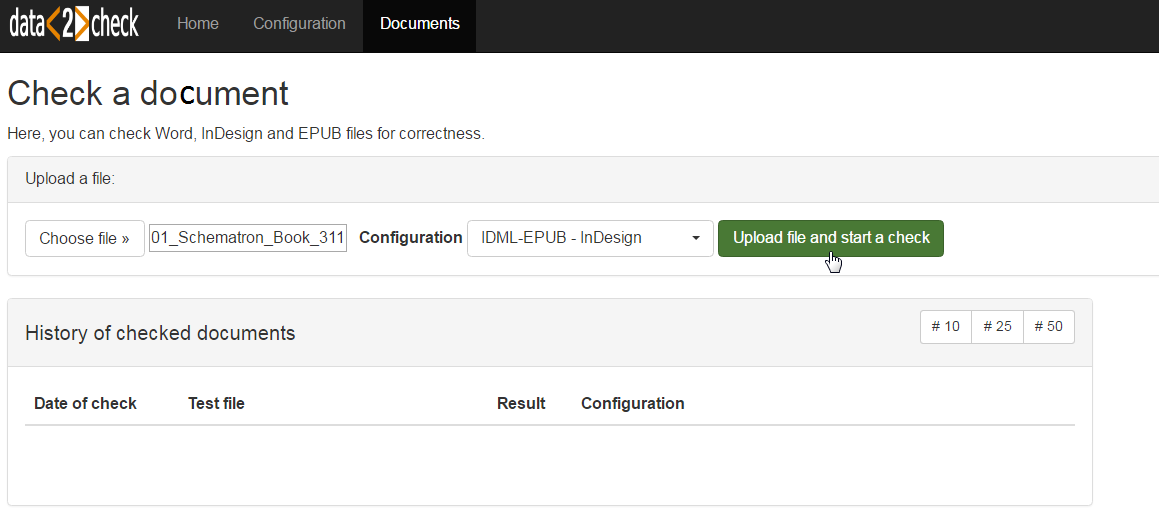
Figure 4: Click on »Upload file and start a check«.
Now, you will see a clock symbol which displays the progress of the document check. This process may take some seconds (see figure 5).
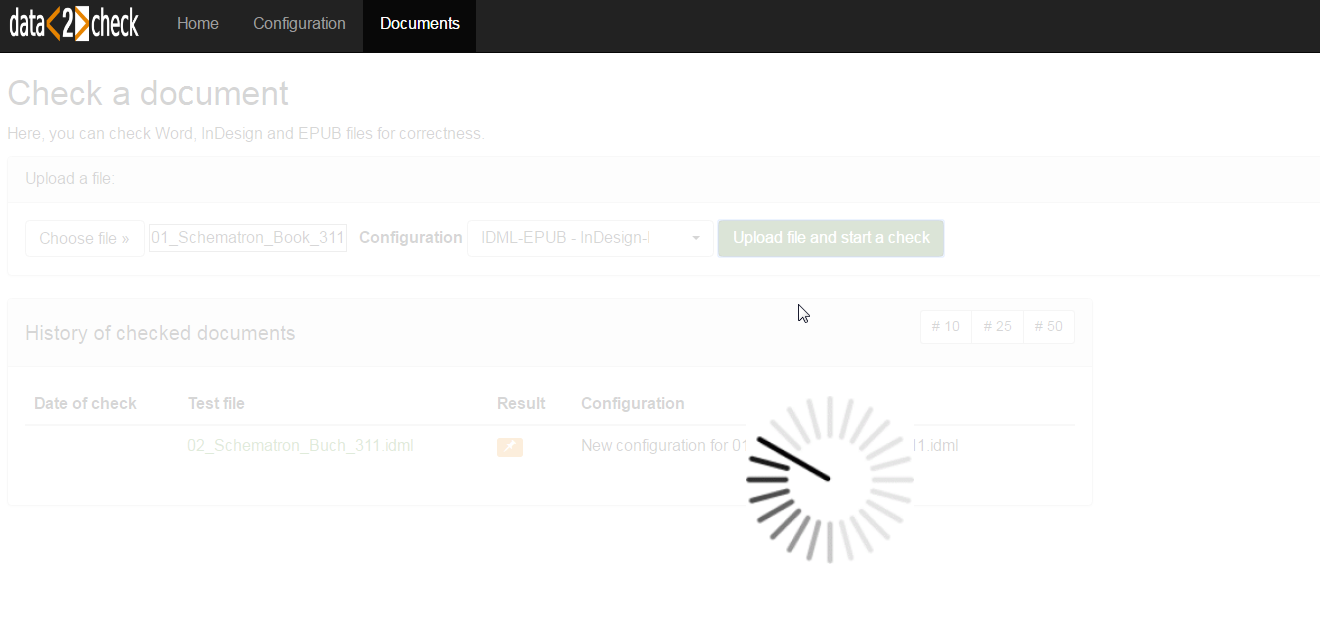
Figure 5: The check of the InDesign document is in progress.
The document selected by you was successfully checked. After completion of the check, you can see the output documents on the ride-hand side (see figure 6).
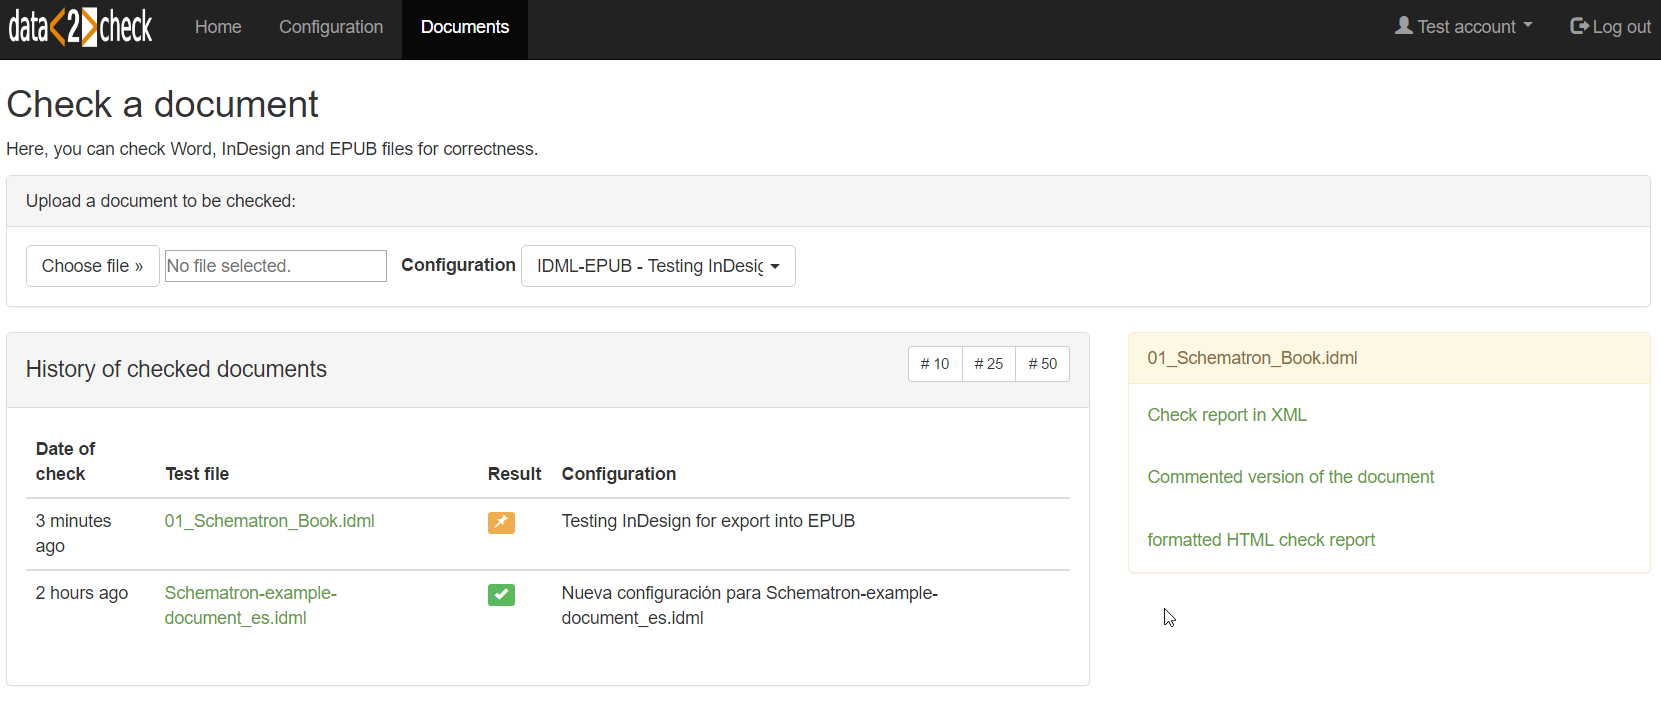
Figure 6: The document check is completed.
Further information on the individual output documents can be found in detail in the following.
2.2 The output documents
Irrespective of whether a check was "successful" (no errors found) or "not successful" (errors found), always three output documents are displayed in the form of links (see figure 7):
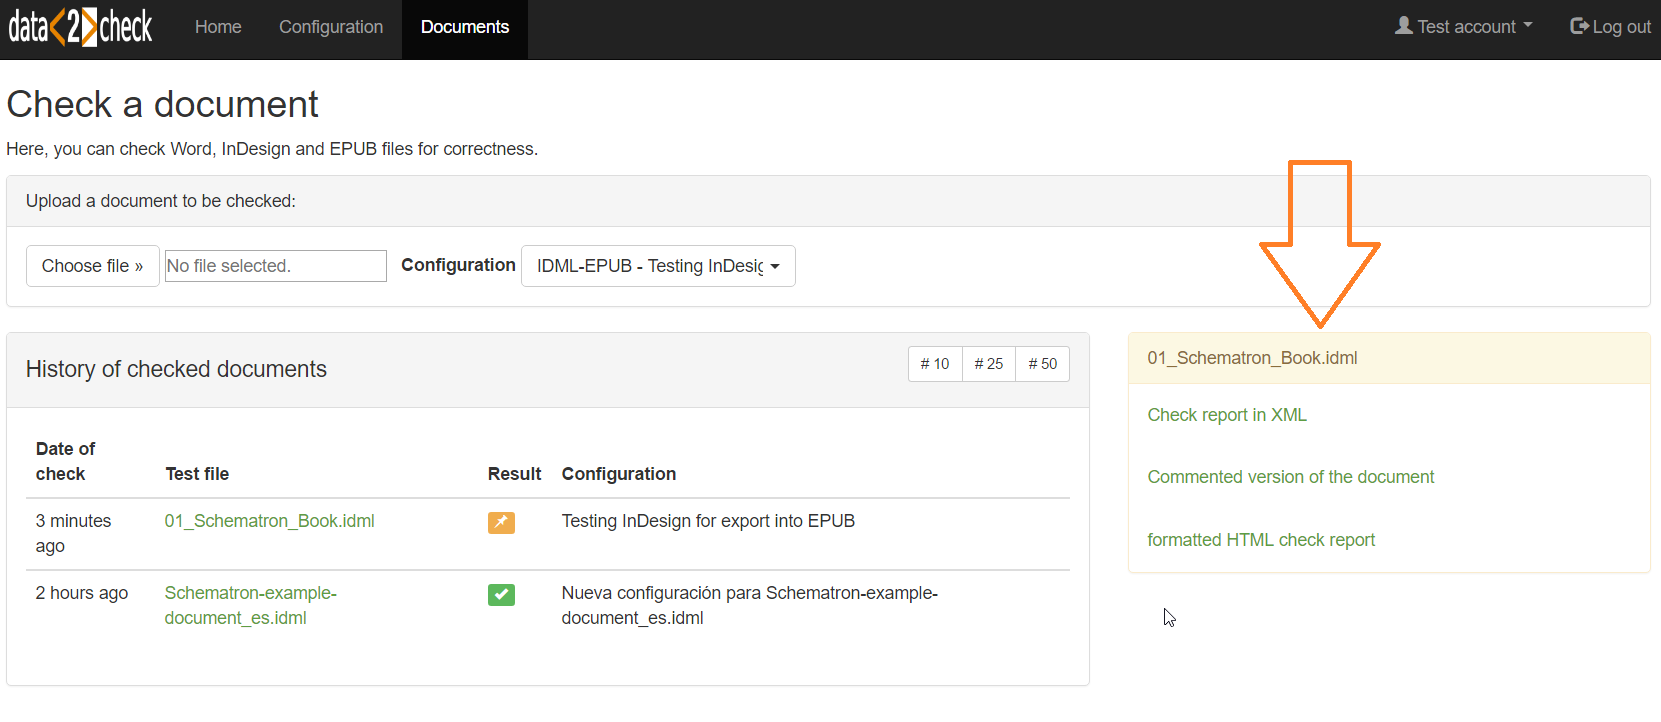
Figure 7: The three output documents.
-
Check report in XML: By following this link, a check report in the SVRL (Schematron Validation Report Language) format is downloaded (see figure 8). This report can be used for further processing with XSLT or XPath.
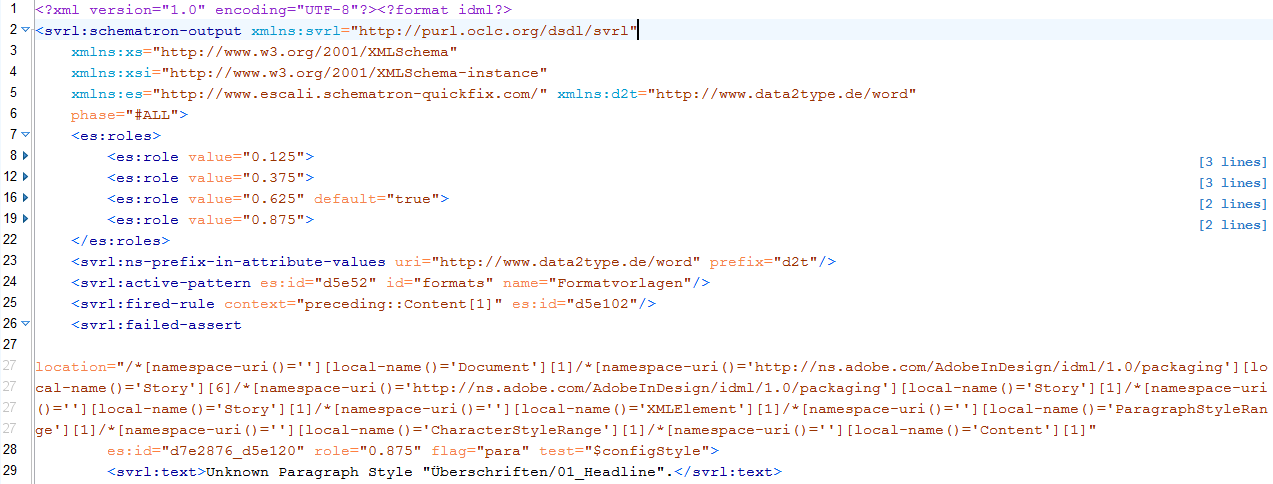
Figure 8: The SVRL check report (excerpt).
-
Commented version of the document: By following this link, an InDesign output document is downloaded. This exact copy of your uploaded document to be checked contains "comments" on the errors found at the relevant paragraph. These comments are composed as follows:
-
The Notes feature of InDesign in order to mark the spot where the error occured including a description of the error in the respective Note (see figure 9).
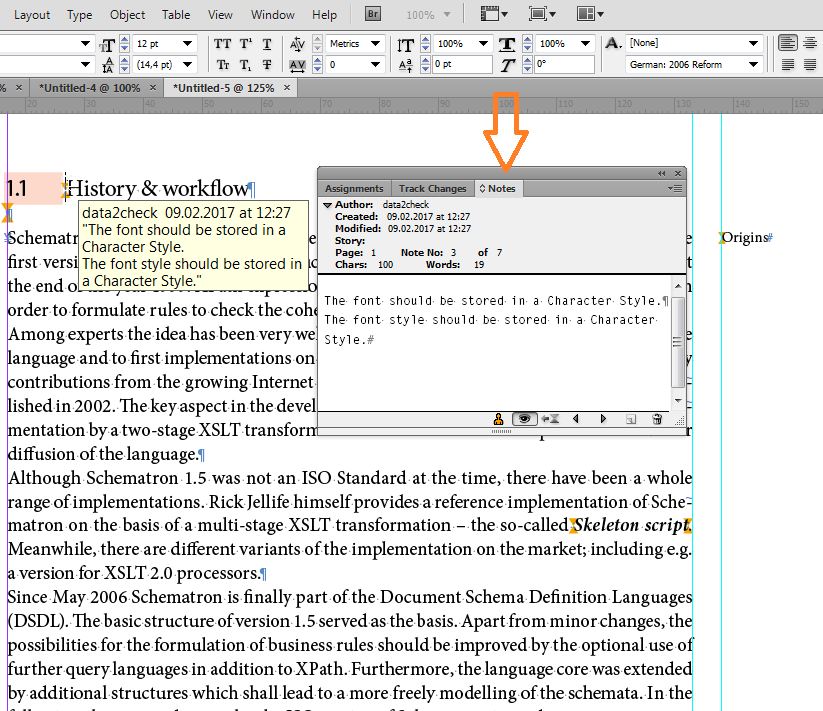
Figure 9: InDesign Note for an error message.
-
Summary error reports per text frame or other page objects in the form of new text frames (yellow background colour) lying at a non-printable layer (see figure 10). The numbers in the round brackets indicate the frequency of occurence of the individual error.
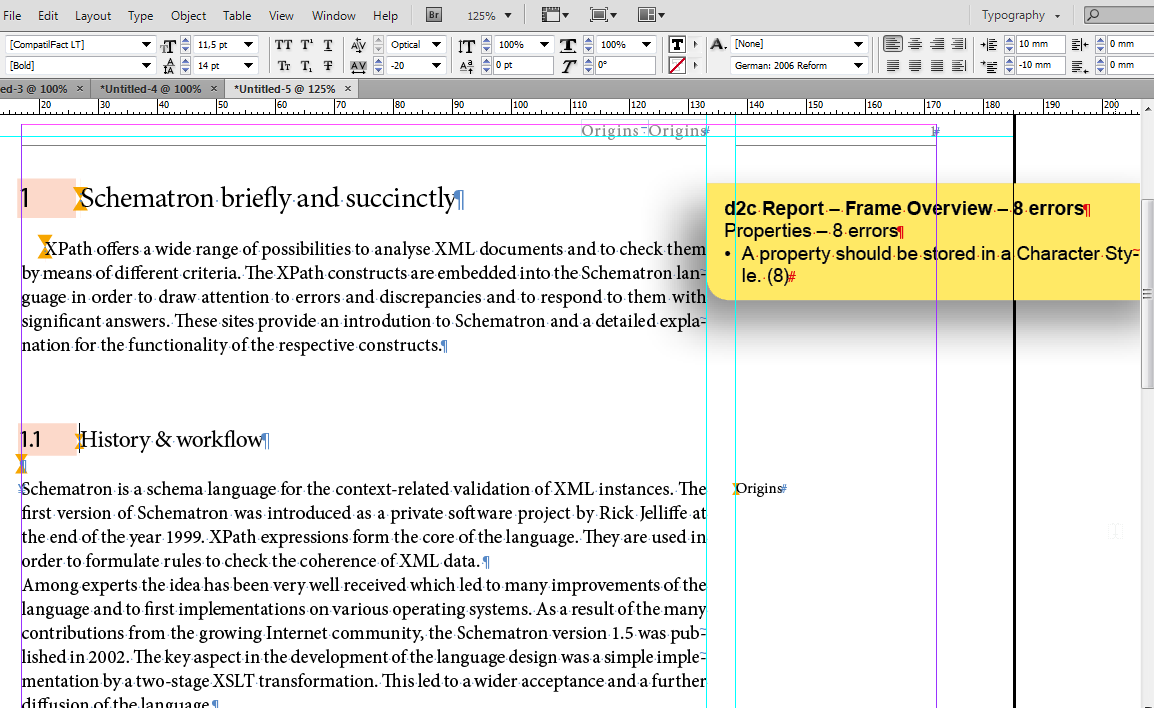
Figure 10: Frame overview with listing of errors.
-
One summary report for the whole document on the first page in the form of a new text frame (yellow background colour) lying at a non-printable layer (see figure 11). The numbers in the round brackets indicate the frequency of occurence of the individual error.
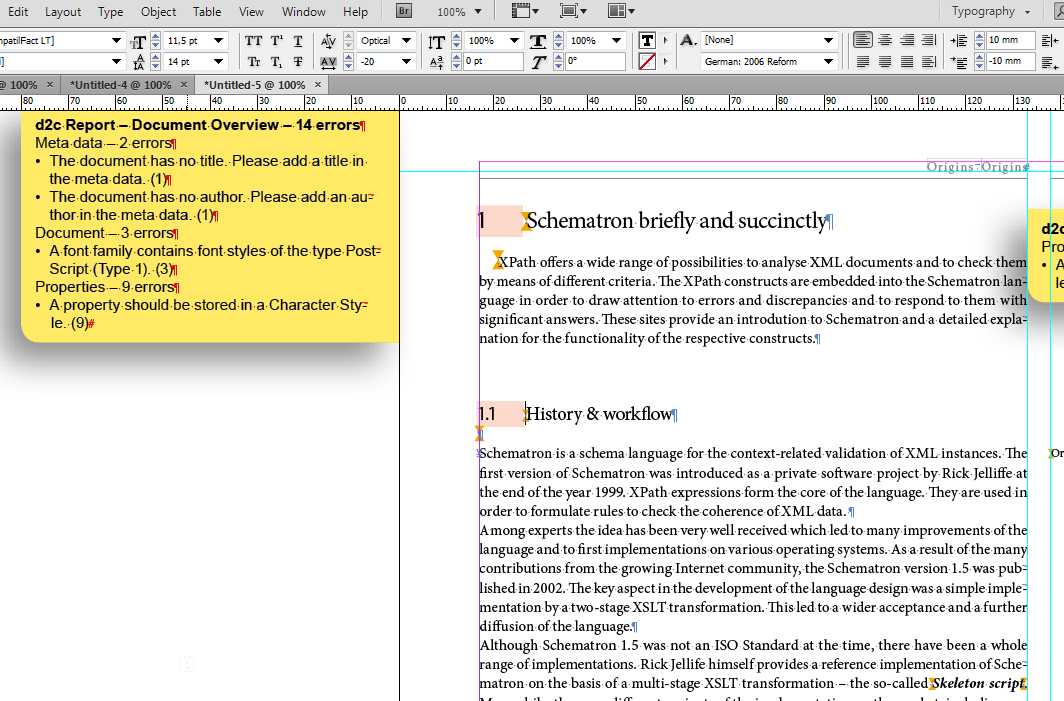
Figure 11: Document overview with complete listing of errors.
With the help of this commented version you can directly view any formatting errors in the InDesign document, correct them and then, where appropriate, upload the corrected document again for a new check.
-
-
formatted check report: By following this link, a summary containing the errors as well as the error messages is downloaded as HTML (see figure 12). With the help of this check report you gain an initial overview of the extent and seriousness of the errors in the InDesign document.
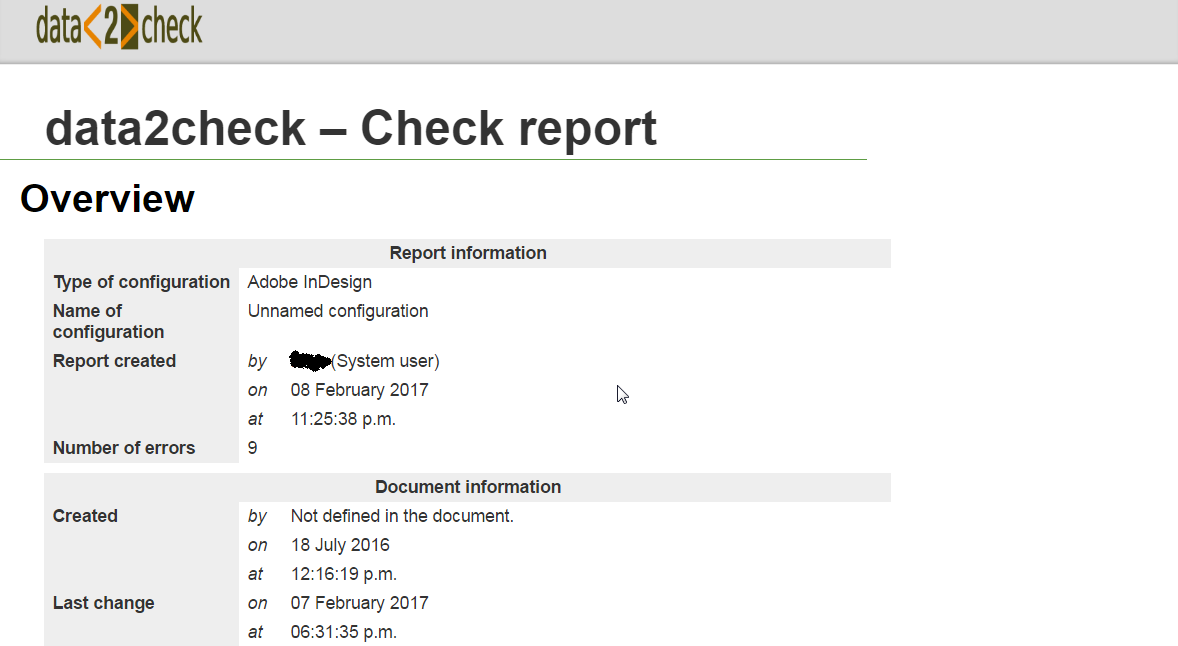
Figure 12: The formatted check report in HTML (excerpt).
In addition, you can directly see the errors found with the help of a browser preview. By clicking the »Details« section, all errors are listed and can be directly reviewed in the HTML version of your document when following the [Preview] link at the end of each list point (see figure 13).
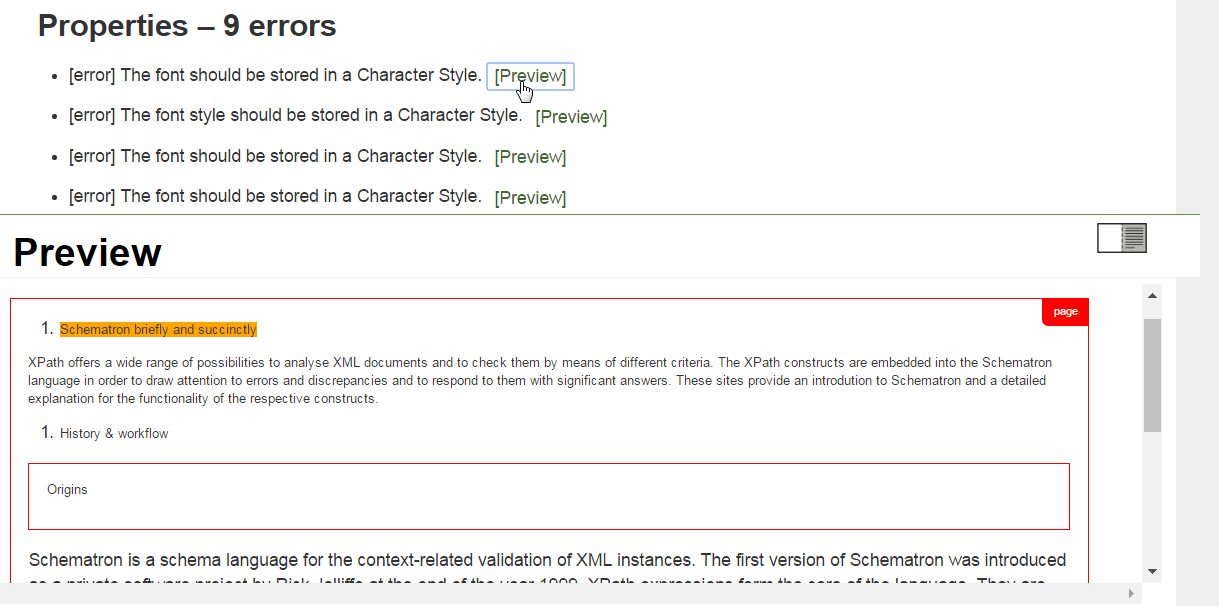
Figure 13: The preview feature in the formatted check report.
3. The history of checked documents
In the History of checked documents under the menu option »Documents« (left-hand side) all checks already carried out are listed in chronological order and access to the individual check results is granted. Therefore, the History of checked documents represents your personal database.
In this table all previous checks are listed including the time of the check (»Date
of check«), the name of the file to be checked (»Test file«), the result of the check
(green check icon (![]() ) for "successful check and no errors found", orange pin (
) for "successful check and no errors found", orange pin (![]() ) for "successful check but errors found" and red flash (
) for "successful check but errors found" and red flash (![]() ) for "check has failed, e.g. due to a system error") as well as the configuration
used for the individual check (see figure 14).
) for "check has failed, e.g. due to a system error") as well as the configuration
used for the individual check (see figure 14).
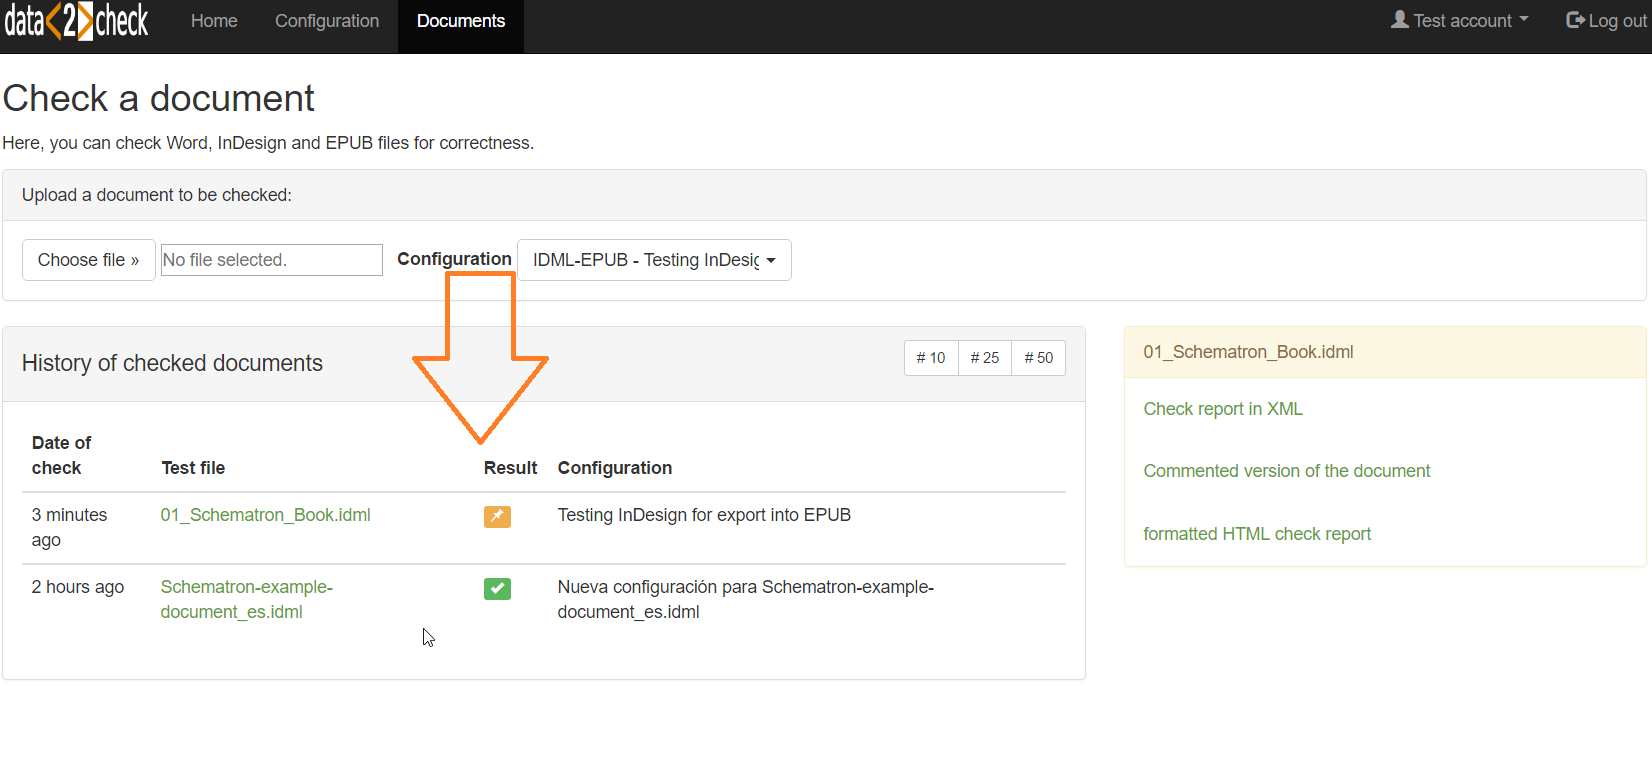
Figure 14: The History of checked documents.
By clicking one of the documents linked under »Test file«, the appropriate output documents appear on the right-hand side and can be viewed as described under 2.2 The output documents (see figure 7).
Your History of checked documents can also be found on the data2check start page under the menu option »Home« (see under 4.1 Home in the general part of this help).